
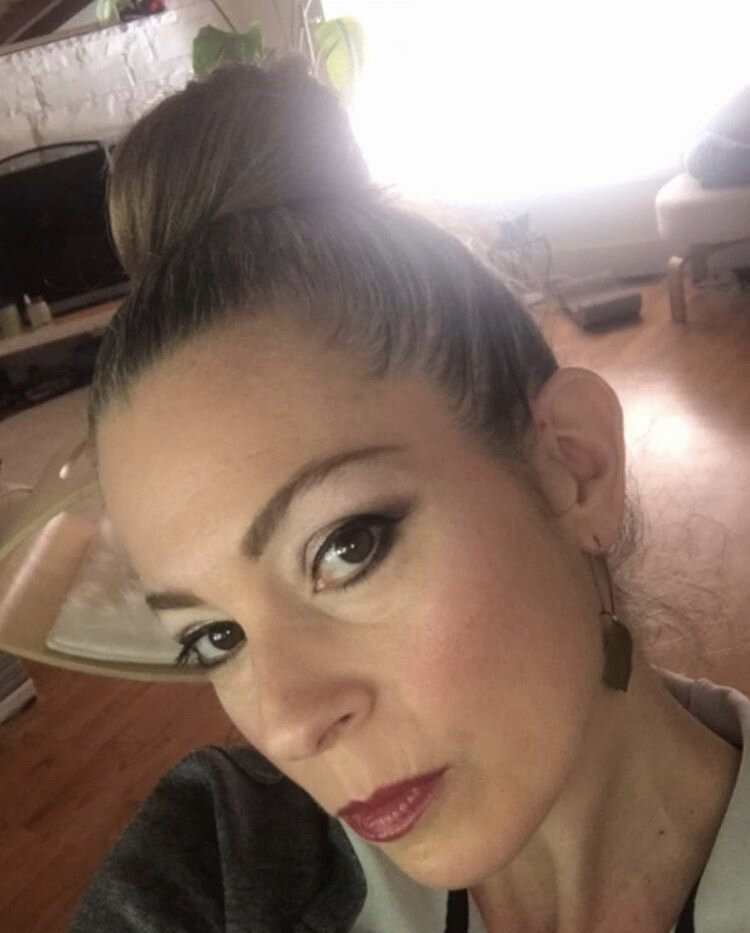
![All Made Up and Nowhere To Go [That Flamenco Look]](https://images.squarespace-cdn.com/content/v1/568079e7bfe873f15c115eee/1588562024077-V6FSSR57OZV3T1BJTEPE/IMG_6594.jpg)

Flamenco make up at home
A couple of weeks ago I participated in a fun flamenco makeup tutorial sponsored by my friends at Espacio de Arte Seattle. It was a great excuse to gather, get made up, and learn something while observing shelter in place due to the Coronavirus pandemic.
Sarah Ward, who led the tutorial, gave us some great tips.
Here’s one of my favorites,
It’s always easier to add than to take away.
This is so true.
And especially important when putting on eye makeup, namely eyeshadow, which can be one of the most challenging things to do well.
It’s best to go slowly, and check your work in the mirror as you go, adding as needed and desired. (Rather than trying to speed things along, making a mess of your eyes, trying to correct only to find yourself having to remove it all and start over or leaving things looking less than ideal.)
It’s also beneficial to use quality products, especially eyeshadows with rich and easily bendable colors and soft eye pencils that go on smoothly.
Below are the steps I followed to get the look you see pictured.
The order of application that Sarah took us through was a bit different than what I normally do, starting with the eyes rather than foundation. I really liked doing it this way and might follow this order from here on out.
How I Got This Look:
STEP ONE:
Prepare the face.
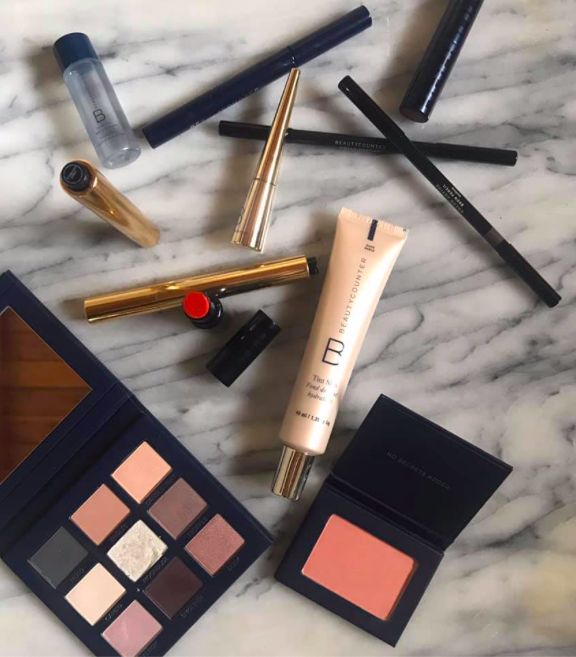
As always, I began by prepping my face. (Before the tutorial began I washed with this cleansing oil then gently exfoliated with a warm damp washcloth, applied this hydrating essence, this serum, and finally this moisturizer.)
STEP TWO:
Prime eyelids.
I used this concealer to do so.
STEP THREE:
Eyeshadow.
I used five shades on my upper lids. They are, in order from top to bottom, all from the Velvet Eyeshadow Palette in Romantic: 1. Cameo 2. Candlelight 3. Truffle 4. Smolder 5. Moondust
STEP FOUR:
Prime face.
I used this cream for that.
STEP FIVE:
Foundation.
I applied this foundation using my fingertips, but you could also use a foundation brush.
STEP SIX:
Set foundation.
I used this mist to do so.
STEP SEVEN:
Conceal.
I used this concealer pen under the eyes and as in some spots on the face.
STEP EIGHT:
Blush.
I used this powder blush. Sarah had us put on a smile to hit all the right spots. (Check out this article to for tips on blush application for different face shapes.)
STEP NINE
Highlight.
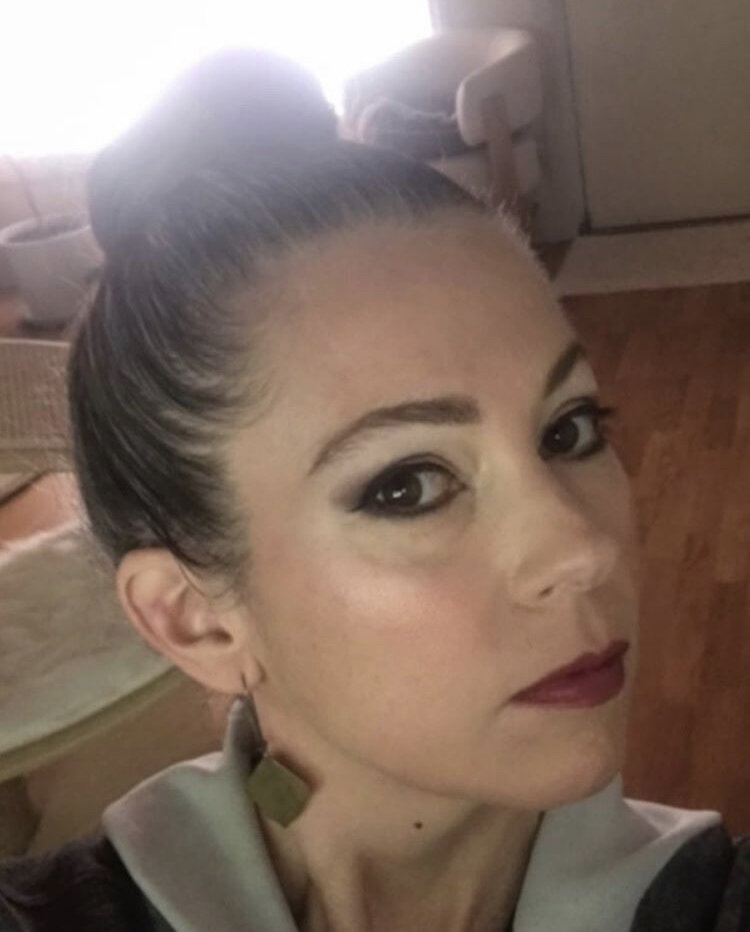
This was a new step for me and one I look forward to learning more about. I used a light eyeshadow color (cameo) to highlight on my cheeks, above the eyes, and on my chin.
STEP TEN
Eyebrows.
I used this brow pencil to enhance and define my brows. I love the brush that comes with it and how easily it goes on, and I LOVE this quick brow demo by Christy Coleman.
STEP ELEVEN
Touch up.
Concealer is great for cleaning up lines on the brows and eyes.
STEP TWELVE
Line upper lids.
I used this liquid eyeliner to get a clean, defined line on my upper lids.
STEP THIRTEEN:
Mascara.
I used this lengthening mascara on my upper lashes only.
STEP FOURTEEN:
Line lower lids.
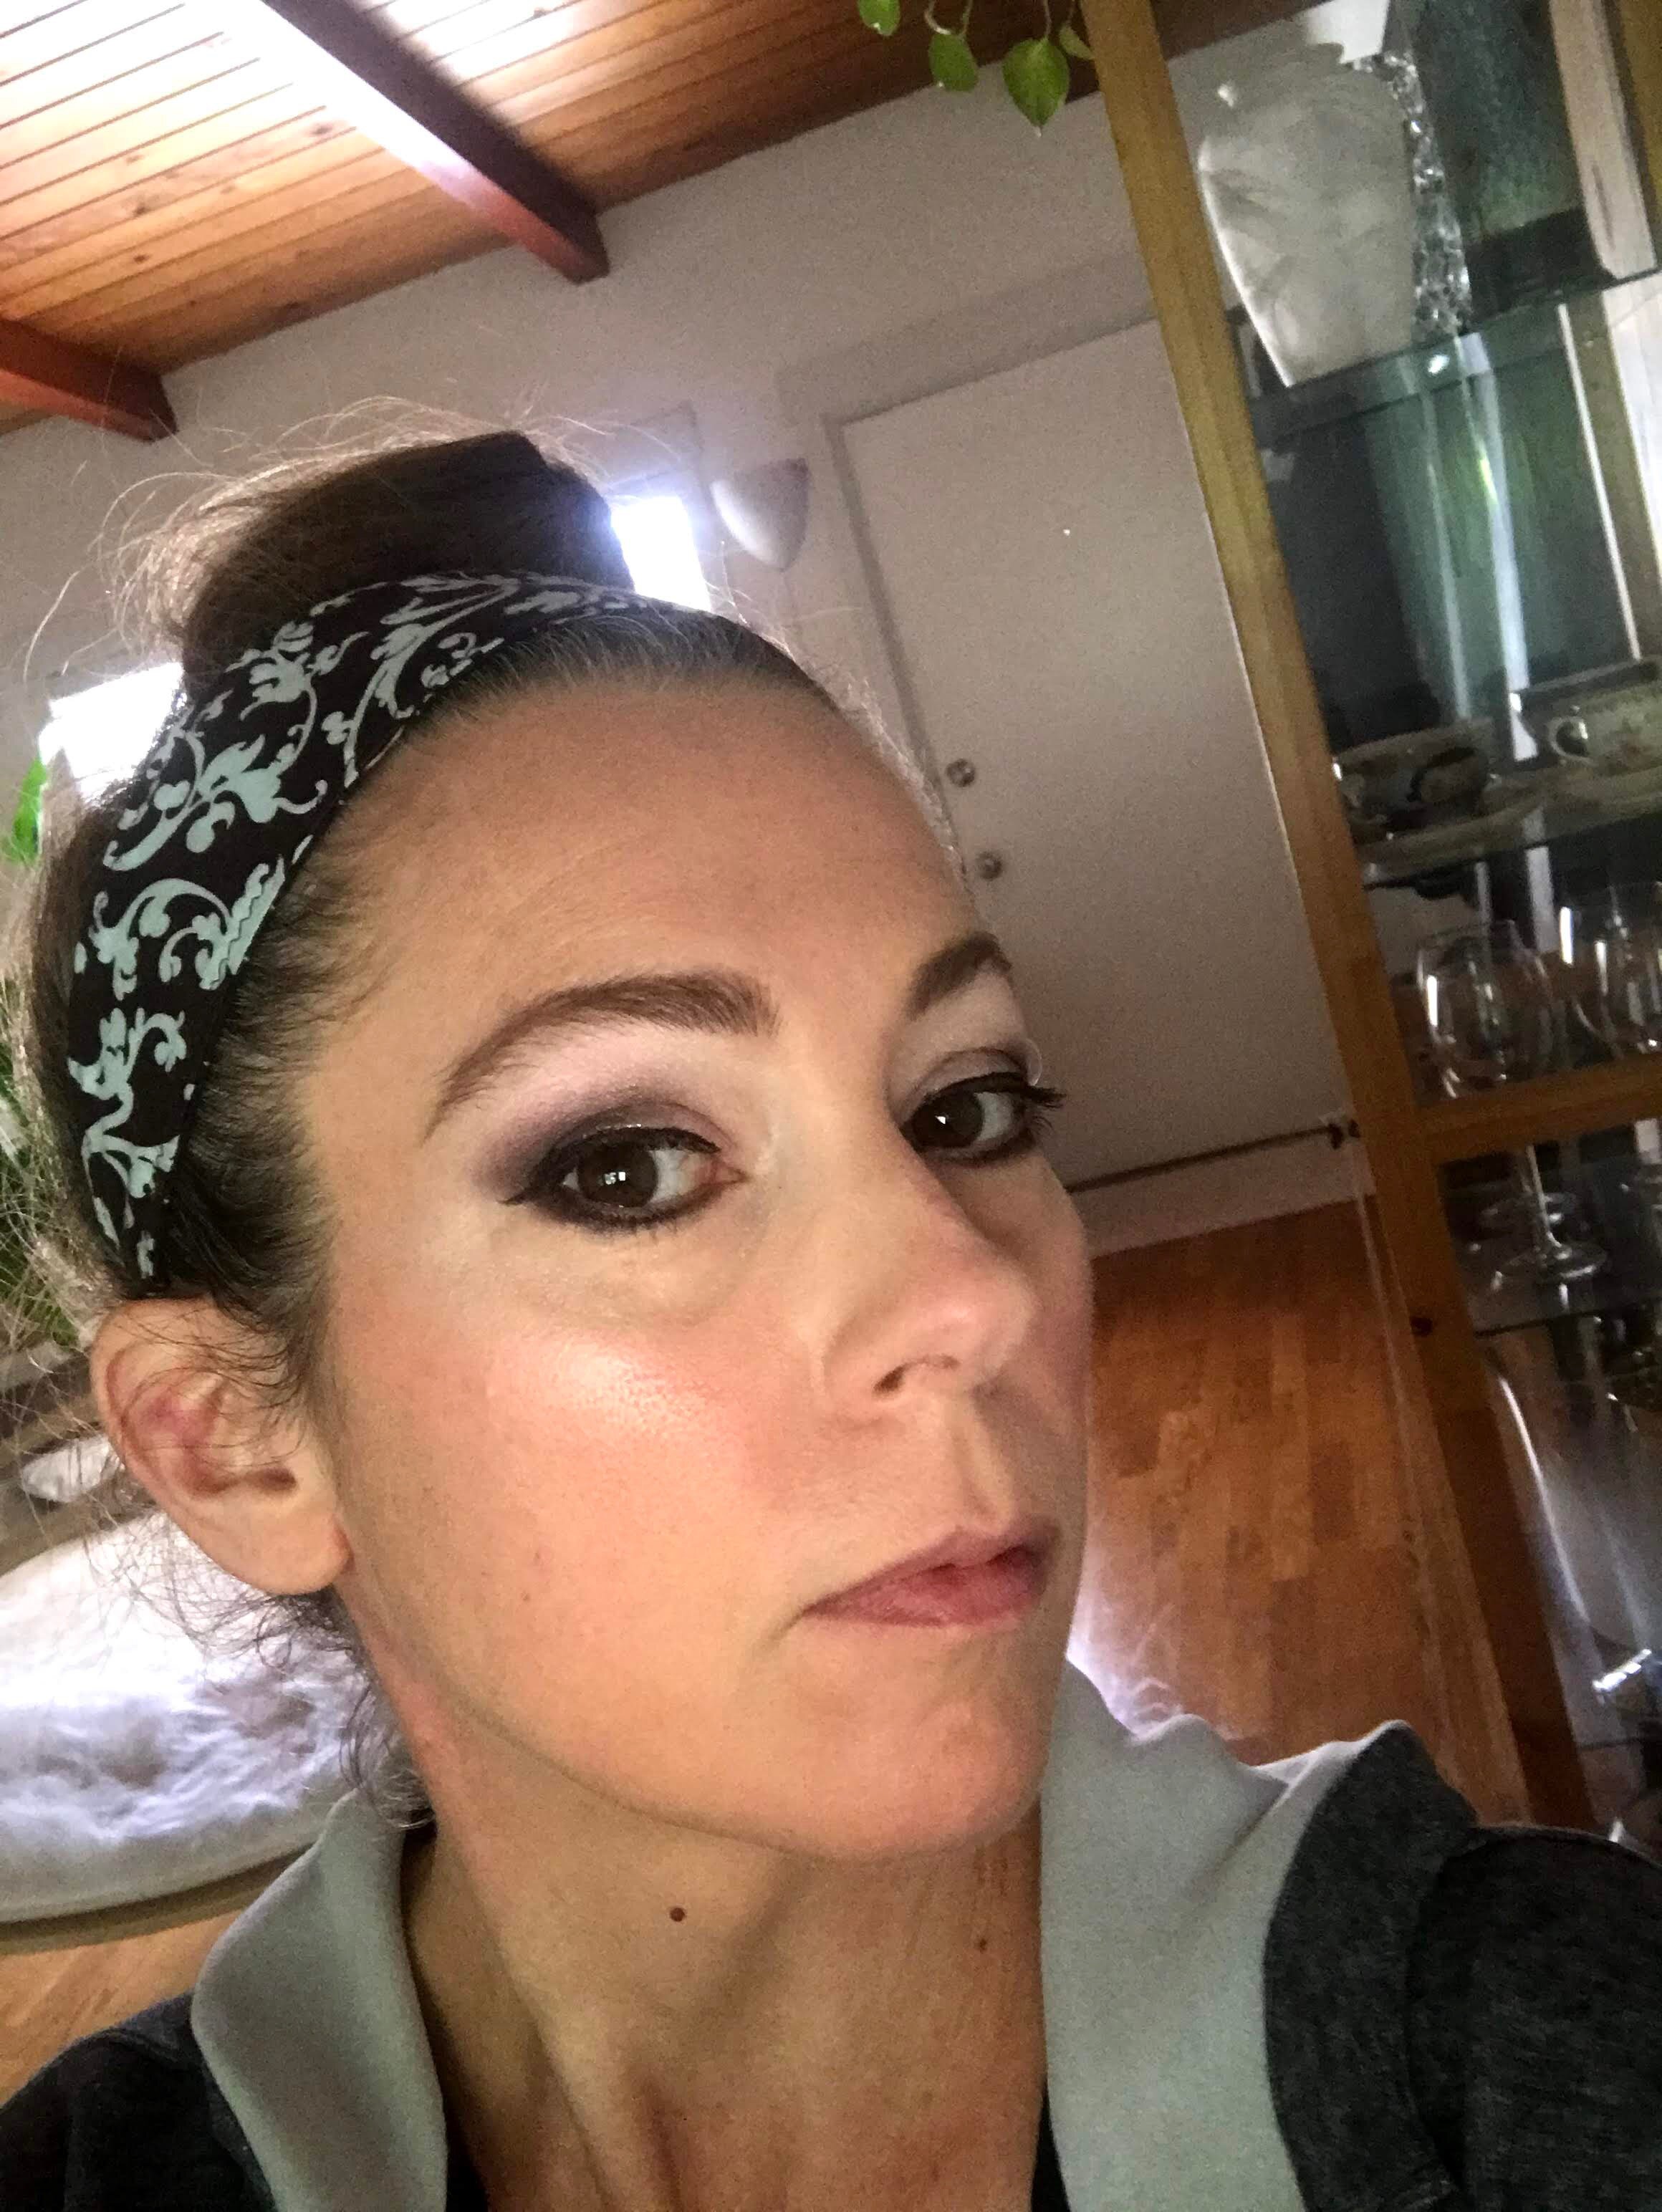
I used three different products to line the lower lids. First, I applied dark brown eyeshadow (smolder). In the past I have just used eyeliner for the lower lid, but Sarah showed us how to do this with shadow which I loved. I also loved how smoothly and easily the velvet color went on. I enhanced the line with this black eye pencil and a touch of medium brown brow pencil. Sarah went for a softer look, stopping the line before reaching the inner eye, but I like to extend the liner to the inner eye or close to it.
STEP FIFTEEN:
Lips.
I went for an intense but semi-neutral red (Little Black Dress) lipstick.
The end.
This was not a quick process.
Still, though there are many steps listed, most don’t require too much time to perform.
The most involved part of the process was doing the eyes. We spent a lot more time on them than I normally do, but it definitely paid off!
If you don’t have time to do all of these steps, you could certainly take some out or tone some down.
Ready to give it a try?
Let me know how it goes for you in the comments below. (And link to a pic of yourself if you’d like!) And if you’re curious about any of the shades I used that I haven’t listed, feel free to ask below.

You Might Also Enjoy
One Thing We Need to Know About Letras
*As an Independent Consultant for Beautycounter, at no additional cost to you, I will earn a commission should you decide to make a purchase after clicking thorough a link on this page. I recommend these products because I use and love them and appreciate that they safe, high performing, and ethically sourced. Please do not spend any money on these products unless you feel they will be useful to you.
Did you know that Beautycounter makeup is free of lead, asbestos, formaldehyde, and over 1800 questionable or harmful chemicals? Did you know that each batch of color cosmetics is tested for a suite of heavy metals before going on the market? Did you know the ingredients, like mica, used are ethically sourced?
Here’s to high performing, clean, and responsibly made make up.